
Downloading and installing Clash for Windows is a straightforward process that can be completed in just a few steps, ensuring users can quickly take advantage of its robust feature set.
To begin, you’ll need to visit the official GitHub software repository, where you can find the latest installer package that meets your system requirements. Ensure your Windows environment is ready for installation by checking hardware and software prerequisites, which will facilitate a smooth setup experience.
After successfully downloading the installer package, the next step is to run the installer to begin the installation process of Clash for Windows. This can typically be done by double-clicking the downloaded file or executing it through the command prompt for more advanced users who prefer command line operations.
How to Set Up and Use Clash for Windows?
Setting up and using Clash for Windows is essential to maximize its capabilities for network management and traffic routing.
This utility client allows users to configure proxy settings through customized routing rules, ensuring that internet access is optimized for both performance and security.
Step 1: Configure Proxy Settings
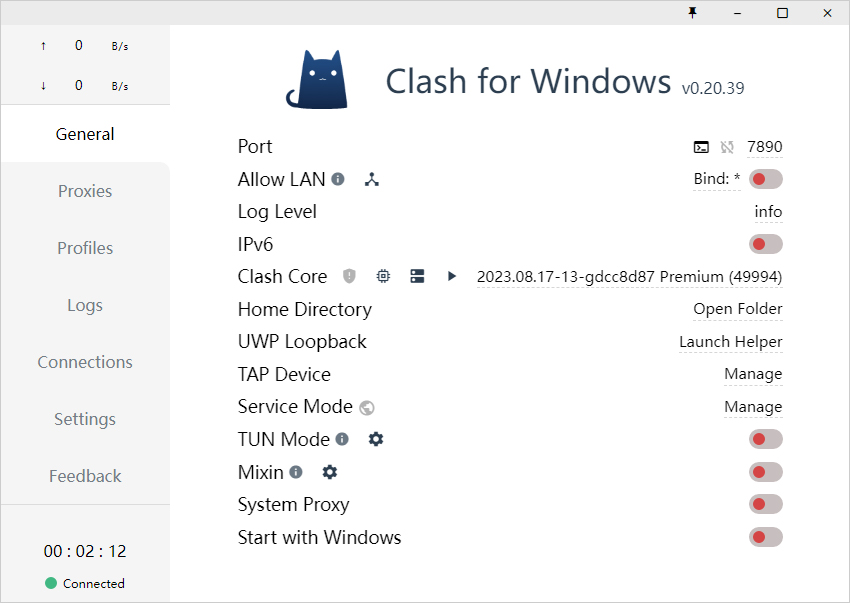
The first step in setting up Clash for Windows involves configuring the proxy settings to ensure effective traffic management and internet security. Users can establish a local proxy configuration that allows for optimized traffic routing and improved DNS settings, thereby enhancing their overall internet experience.
- To begin this process, users should access the application’s settings menu and locate the proxy section. Here, options such as HTTP, SOCKS5, and Shadowsocks can be selected depending on specific needs.
- For example, using a SOCKS5 proxy helps in dealing with diverse traffic types effectively, while setting up a local proxy enhances connection speed by reducing latency.
- Best practices include regularly updating proxy lists and integrating failover mechanisms to maintain connection stability.
- Users should ensure that they test their configurations to ascertain correct routing and DNS functionality, ultimately securing their online activities.
Step 2: Import or Create Rules
After configuring the proxy settings, the next step is to import or create rules within Clash for Windows that dictate how internet traffic will be managed. The rule engine allows users to establish custom rules that align with their specific networking needs, ultimately optimizing application settings for enhanced performance.
This process involves either uploading existing rule sets that have proven effective in various scenarios or crafting entirely new rules from scratch based on unique requirements.
For example, one might set rules to prioritize bandwidth for critical applications while throttling less important traffic. Customization plays a crucial role here, as it enables users to tailor the rule sets to their environments, ensuring smooth operation and efficiency in data handling.
Step 3: Start the Proxy Server
Once the rules have been established, the next step is to start the proxy server within Clash for Windows, enabling the configured settings to take effect. This action integrates the networking tools and configurations set up earlier, ensuring that all internet traffic is routed according to the established rules and performance metrics.
To initiate the proxy server, users should locate the ‘Start’ button within the Clash for Windows interface, typically found in the main dashboard.
Upon clicking this, the command prompt may briefly appear, indicating that the server is booting up and connecting to the network. It’s important to monitor any messages that might appear, as these can provide valuable insights into the connectivity status.
Once operational, the proxy server significantly enhances network throughput by efficiently managing data traffic and optimizing connection stability, which is crucial for activities like streaming, gaming, or accessing restricted content.
Step 4: Connect to the Proxy Server
The final step in utilizing Clash for Windows involves connecting to the proxy server, allowing users to experience enhanced internet connectivity and performance. By establishing this connection through the user interface, all configured rules will be applied, ensuring a seamless browsing experience and optimized application performance.
To connect to the proxy server, first, navigate to the ‘Connections’ tab within the application, which is easily accessible from the main dashboard.
Here, users can select the desired proxy configuration and click the ‘Connect’ button. Upon successful connection, indicators will display the status, affirming that the setup is active.
This vital step not only boosts network reliability but also minimizes latency and improves overall data flow, enabling applications to run more efficiently while minimizing interruptions.
Frequently Asked Questions
What is Clash for Windows Rule-Based Proxy Utility Client and where can I download it?
Clash for Windows is a free and open-source rule-based proxy utility client for Windows operating system. It can be downloaded from its official website or from trusted software download websites.
What are the system requirements for installing Clash for Windows?
To install Clash for Windows, you need to have a computer running on Windows 7 or higher operating system with at least 100 MB of free space on the hard drive and 2 GB of RAM.
Is it safe to download and install Clash for Windows on my computer?
Yes, Clash for Windows is a safe and trusted software that is regularly updated with the latest security patches and features. It is also free from any malware or viruses, so you can download and install it without any worries.
Can I customize the rules and settings of Clash for Windows according to my preferences?
Yes, Clash for Windows allows users to customize the rules and settings based on their individual needs and preferences. You can create and edit rules, add or remove proxies, and modify other settings to optimize the performance of the utility client.
Do I need to have any technical knowledge to install and use Clash for Windows?
No, Clash for Windows is designed to be user-friendly and easy to use. You do not need any technical knowledge or expertise to install and use the utility client. However, basic understanding of proxies and network settings can be helpful in customizing the rules and settings.
Is Clash for Windows compatible with all types of proxies?
Yes, Clash for Windows is compatible with various types of proxies, including HTTP, SOCKS5, Shadowsocks, and VMess. It also supports proxy protocols such as HTTP/HTTPS, SOCKS5, and Shadowsocks.