
Configuration files in Clash are critical for establishing the manner in which the application interacts with proxy servers, enabling users to customize their network experience through YAML syntax. These files govern various elements, including proxy settings that dictate traffic routing and filtering rules that ensure secure and efficient connections.
Common configurations involve setting up multiple proxies to assess speed and reliability, defining upstream and downstream protocols, and implementing traffic rules to prioritize specific types of data.
For instance, one can specify a rule that directs all gaming traffic through a high-speed proxy while routing standard browsing through a slower one. This level of customization significantly enhances both security and performance.
Understanding Clash Config Files
Mastering Clash configuration files is essential for achieving optimal network performance, as these files determine the application’s behavior through defined YAML structures.
File Formats and Structure
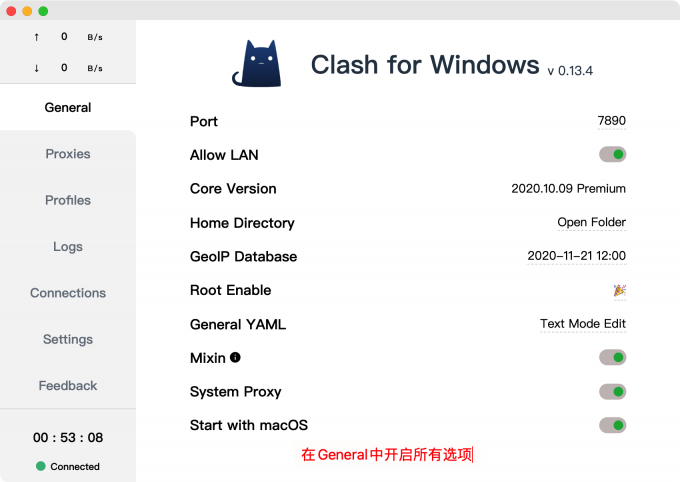
Clash configuration files primarily employ YAML syntax, which facilitates a human-readable format that effectively organizes network rules and settings. Each configuration begins with key-value pairs, such as ‘port: 7890’ for the listener and ‘mode: rule’ for the proxy mode.
Hierarchical structures are essential; for instance, it is necessary to specify ‘proxies’ under a main ‘proxy-groups’ heading. Proper indentation is critical-two spaces should be used per level, as the use of tabs may result in parsing errors.
When defining rules, it is important to prioritize them from most to least specific to ensure the smooth operation of the setup. Testing the configuration with tools such as YAML Lint is advisable to identify any formatting issues prior to deployment.
Common Configurations
Several common configurations in Clash can significantly enhance user experience. This includes defining proxy servers, establishing routing rules, and managing DNS settings.
To define a proxy server, one should navigate to the ‘Proxy’ section and enter the server address along with the corresponding port number.
For routing rules, it is possible to establish traffic patterns that direct specific applications through designated proxies. This can be accomplished under the `Rules’ tab, where one can specify either ‘Domain’ or ‘IP’ rules.
Additionally, managing DNS settings by configuring a custom DNS resolver can enhance both the speed and security of DNS queries. This configuration is found in the `General’ settings tab.
Implementing these adjustments can lead to significant improvements in network performance.
How to Add Config Files
Incorporating configuration files into Clash for Windows is a straightforward procedure that allows users to effortlessly customize their network settings.
Downloading Config Files
To enhance functionality, users are advised to download standard or custom configuration files from reputable sources, thereby ensuring compatibility with the Clash app.
It is recommended to begin by visiting trusted repositories such as GitHub or specialized community forums, including Reddit’s r/Clash, to access relevant resources. Users should seek files that have received positive reviews and are frequently updated, as these are more likely to be secure and operational.
Upon downloading the files, it is essential to set the appropriate file permissions; this can typically be accomplished through the file properties menu on most operating systems.
Users should adhere to the documentation provided with the configuration files to ensure a seamless integration into Clash, facilitating a personalized user experience.
Adding Config Files to Clash for Windows
After downloading, the process of adding configuration files to Clash entails a few straightforward steps: identifying the appropriate directory and importing the file through the application interface.
First, locate the configuration folder, which is typically found in the Clash installation directory at `~/.config/clash/` on Linux or `C:\\Users\\YourUsername\\.config\\clash` on Windows.
Next, launch the Clash application. Navigate to the ‘Profiles’ tab and select ‘Import’ to browse for the downloaded configuration file.
Once the file is selected, confirm the import. Then, choose the newly added profile from the drop-down menu and click ‘Apply’ to initiate its use. This entire process generally takes only a few minutes and facilitates a seamless integration of the configuration.
Using Config Files in Clash for Windows
The effective utilization of configuration files in Clash enables users to transition between various network configurations and assess their performance under a range of conditions.
Switching Between Configurations
The process of switching between configurations in Clash is designed to be seamless, allowing users to adjust their network settings according to real-time requirements or preferences.
To switch configurations, users need only to select the `Config’ tab located at the bottom of the screen. From this interface, they can choose from saved profiles, such as:
- `Office’ for a stable work environment
- `Travel’ for a more flexible setup with broader connectivity options
For instance, activating the `Gaming’ profile optimizes network performance by reducing latency during online gaming sessions. Additionally, users may utilize shortcuts for more efficient transitions; by assigning a custom quick-access button, they can toggle between frequently used configurations with a single tap, thus facilitating swift adjustments to connectivity settings.
Testing Configurations
Testing configurations in Clash is essential to ensure that routing rules and proxy settings operate as intended, thereby enabling users to troubleshoot effectively and optimize performance.
To begin, it is advisable to conduct a connectivity test to confirm the stability of your internet connection and ensure that Clash can access the configured proxies. This can be accomplished using the ‘Test’ feature integrated into Clash, which verifies the availability of the connections.
It is also important to monitor performance metrics, including latency and bandwidth usage. Tools such as Speedtest can assist in evaluating overall performance.
Users should be vigilant for common issues, such as DNS leaks or incorrect routing, by analyzing the logs provided by Clash.
Regularly reviewing these metrics is crucial for maintaining an optimal configuration.
Common Issues and Troubleshooting
Users may experience a range of issues while utilizing Clash for Windows, making troubleshooting a critical competency for ensuring optimal performance.
File Not Recognized
A prevalent issue encountered is the ‘file not recognized’ error, which frequently arises from incorrect file formats or improper YAML syntax within configuration files.
To address this issue, it is advisable to first verify the file format to ensure it aligns with the expected type for the specific program in use.
For YAML syntax, utilizing a validator such as YAML Lint can help identify errors, as common issues include missing colons, incorrect indentation, or unsupported characters.
Additionally, it is important to confirm that the configuration file is saved with the appropriate extension. If the error persists, consider renaming the file, as hidden characters in the filename can sometimes lead to disruptions.
By implementing these steps, the issue can often be resolved efficiently.
Connection Problems
Connection problems may occur due to misconfigured proxy settings or server-related issues, necessitating a thorough analysis to restore stability.
To begin, it is advisable to review your proxy settings and ensure they align with your network requirements. For example, on a Windows system, one should access the Internet Options, navigate to the Connections tab, and appropriately adjust the LAN settings.
If the issues continue, it is recommended to conduct a network analysis utilizing tools such as Wireshark to capture and inspect traffic for any anomalies. Additionally, it is important to verify firewall settings, as software firewalls may inadvertently block essential ports.
Lastly, rebooting the router and modem can often resolve connectivity issues, facilitating a swift restoration of the connection.