
This guide provides all the information needed to enhance your gaming experience with ClashX on macOS, including details on system requirements and a step-by-step process for downloading and installing the game.
Whether you are a novice or a seasoned player facing installation challenges, this resource will offer support. It will also explain how to easily uninstall Clash if you choose to take a break. Explore this guide to learn how to get started with Clash on your Mac.
How to Install Clash on MacOS?
Installing Clash on MacOS is a seamless process that follows the completion of the download, allowing players to quickly set up the game and dive into the action. The installation guide simplifies the steps involved, from locating the downloaded file to following the prompts provided by the installation wizard. With proper guidance, players can effectively navigate through any potential installation issues, ensuring a smooth setup for optimal performance and gameplay experience.
Step 1: Find the Downloaded File
-
Look for the Clash installer in your Downloads folder or wherever you saved it.
-
To stay organized, consider creating a folder for your downloads.
-
If you can’t find the file, use the Mac’s search bar to locate it quickly.
-
Make sure your Mac allows apps from identified developers in System Preferences > Security & Privacy to avoid installation blocks.
Step 2: Start the Installation
-
Double-click the Clash installer file to launch the setup.
-
The installation wizard will open and guide you through the process.
-
Check that your MacOS version is compatible with the game to prevent errors.
-
Follow the prompts carefully, such as agreeing to terms and choosing where to install the game.
Step 3: Follow the Installation Wizard
-
Read each instruction and prompt carefully.
-
You may need to choose an installation folder and grant permissions.
-
Grant any requested permissions to ensure the game works properly.
-
If you encounter errors, check the troubleshooting tips usually provided with the installer.
Step 4: Wait for Installation to Finish
-
Let the installer complete the setup; this may take a few minutes.
-
Avoid interrupting the process to prevent issues.
-
Once done, you’ll see a confirmation message.
-
After that, you can launch Clash and start playing!
How to Troubleshoot Common Installation Issues?
Encountering installation issues while setting up Clash on MacOS can be frustrating; however, there are common troubleshooting steps that can help resolve these problems efficiently. By understanding the typical errors and their solutions, players can navigate through the setup process without major disruptions. This guide explores various installation issues along with practical solutions and support resources, ensuring a smoother experience when launching Clash.
Issue 1: ‘Installation Failed’ Error
This error often happens due to low storage, compatibility problems, or incomplete downloads.
How to fix it:
-
Make sure your Mac has enough free space.
-
Check that your MacOS meets Clash’s minimum system requirements.
-
Update your MacOS to the latest version.
-
Re-download the installer to ensure the file is complete.
-
Clear cache or temporary files to avoid conflicts.
-
Ensure your internet connection is stable during the download.
-
If possible, verify the game files through the app settings to fix any corrupted data.
Issue 2: ‘Clash is Damaged and Can’t Be Opened’ Error
This usually occurs because of Mac security settings blocking the app or an incomplete download.
How to fix it:
-
Go to System Preferences > Security & Privacy.
-
Under the General tab, allow apps downloaded from identified developers.
-
If Clash is blocked, click Open Anyway to permit it.
-
If the error continues, re-download the installer from the official source.
-
You can temporarily disable Gatekeeper or adjust folder permissions to allow the app to run.
Issue 3: ‘Clash is Not Compatible with This Version of MacOS’ Error
This means the Clash version you’re trying to install doesn’t support your MacOS version.
How to fix it:
-
Check Clash’s official website or documentation for the required MacOS version.
-
Update your MacOS via System Preferences > Software Update if possible.
-
If you can’t update, look for a Clash version compatible with your current MacOS.
-
Installing the correct version will prevent compatibility issues and ensure smooth gameplay.
How to Uninstall Clash on MacOS?
Uninstalling Clash on MacOS is a straightforward process that allows users to remove the game effectively while ensuring that all associated files are properly disposed of.
Proper application management is essential when it comes to freeing up storage space and maintaining system performance. This guide outlines the necessary steps to uninstall Clash, ensuring that users can confidently remove the game without leaving behind residual files.
Step 1: Close Clash and Any Related Programs
The first step to uninstalling Clash on MacOS is to ensure that the game and any related programs are completely closed before proceeding with the uninstallation process. This is important to prevent any interruptions or errors during the removal of the application. Ensuring that no instances of Clash are running in the background will facilitate a smoother uninstall process.
Taking the time to close all windows and exit out of the application allows for the proper release of any system resources that might be tied up, which could otherwise lead to incomplete uninstallation.
Users should check the activity monitor to ensure that any lingering processes associated with the game are terminated. This proactive approach helps maintain the overall performance of the Mac, ensuring that no remnants of the game interfere with future installations or software updates.
By meticulously following these steps, one sets the stage for a clean and hassle-free removal of the game.
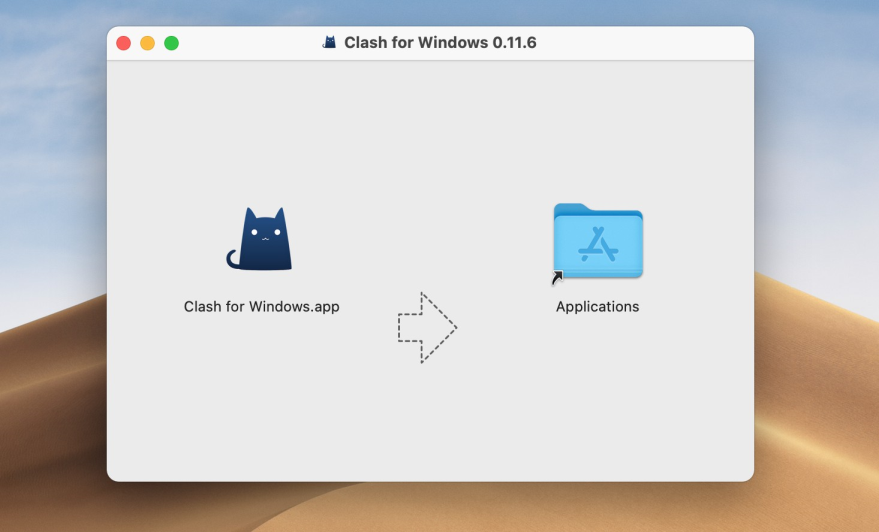
Step 2: Go to the Applications Folder
To begin the uninstallation process, navigate to the Applications folder on your MacOS device where the Clash application is located. This step is crucial for file management, as it allows users to easily access the game and initiate the removal process. Finding the application in this folder is the key to successfully uninstalling Clash without leaving behind any residual files.
Once you’ve accessed the Applications folder, take a moment to locate the Clash app among the various installed programs. It’s essential to ensure you’re selecting the correct application, as mistakenly uninstalling the wrong one can lead to unwanted issues.
Once identified, you can either drag the app to the Trash or use a right-click option to select ‘Move to Trash.’ This straightforward method helps maintain organization on your device while ensuring that uninstallation is thorough, thus preventing clutter and freeing up valuable storage space.
Step 3: Drag Clash to the Trash Bin
Once you have located the Clash application in the Applications folder, the next step is to simply drag the icon to the Trash Bin, which initiates the uninstallation process. This straightforward method effectively removes the application from your system, but it is also important to follow up by emptying the Trash Bin to ensure complete removal of all associated files.
By doing so, not only do you free up storage space, but you also eliminate any leftover data that could potentially conflict with future installations or slow down your device.
After dragging the application, right-clicking the Trash Bin and selecting ‘Empty Trash’ will permanently delete the files you no longer need. This cleanup is crucial in effective file management, ensuring your operating system remains clutter-free and operates efficiently.
Regularly performing these steps can prevent unnecessary bloat, maintain optimal performance, and provide a more pleasant user experience.
Step 4: Empty the Trash Bin
To complete the uninstallation of Clash on MacOS, it is essential to empty the Trash Bin, which permanently removes the application and all its associated files from your system. This final step ensures that no residual data is left behind, helping to maintain optimal performance and free up valuable storage space on your device. It’s advisable to regularly empty your Trash Bin as part of good maintenance practices.
By doing so, users will not only enhance their computer’s responsiveness but also create a more organized digital environment.
The uninstallation process, though straightforward, often leaves behind hidden files and folders that can clutter your system. This is particularly important for applications that utilize extensive resources, as they may leave traces that could hinder your machine’s efficiency.
Taking the time to completely remove all aspects of an application, including emptying the Trash Bin, is a critical step in ensuring your system operates smoothly and enjoys long-term reliability.
Frequently Asked Questions
1. What is Clash for MacOS?
Clash is a popular strategy game that can be downloaded and played on MacOS devices. It involves building and defending your own village while also attacking and looting others.
2. How do I download Clash for MacOS?
To download Clash for MacOS, go to the App Store on your device and search for “Clash.” Once you find the game, click on the “Get” button to download it to your device.
3. Can I download Clash for MacOS for free?
Yes, Clash is available for free download on the App Store for MacOS devices. However, there may be in-app purchases available for additional features and resources.
4. How do I install Clash for MacOS?
Once the game is downloaded from the App Store, it will automatically install on your device. You can then open the game and start playing.
5. Do I need a specific MacOS version to download and install Clash?
Clash is compatible with MacOS devices running version 10.0 or later. Make sure your device meets this requirement before attempting to download and install the game.
6. Can I play Clash for MacOS on multiple devices?
Yes, you can play Clash on multiple MacOS devices as long as they are all signed into the same Apple ID. This will allow you to sync your progress and continue playing on different devices.